The Complete Motorcycle Suspension Maintenance Checklist for Longer Fork and Shock Life
The Complete Motorcycle Suspension Maintenance Checklist for Longer Fork and Shock Life
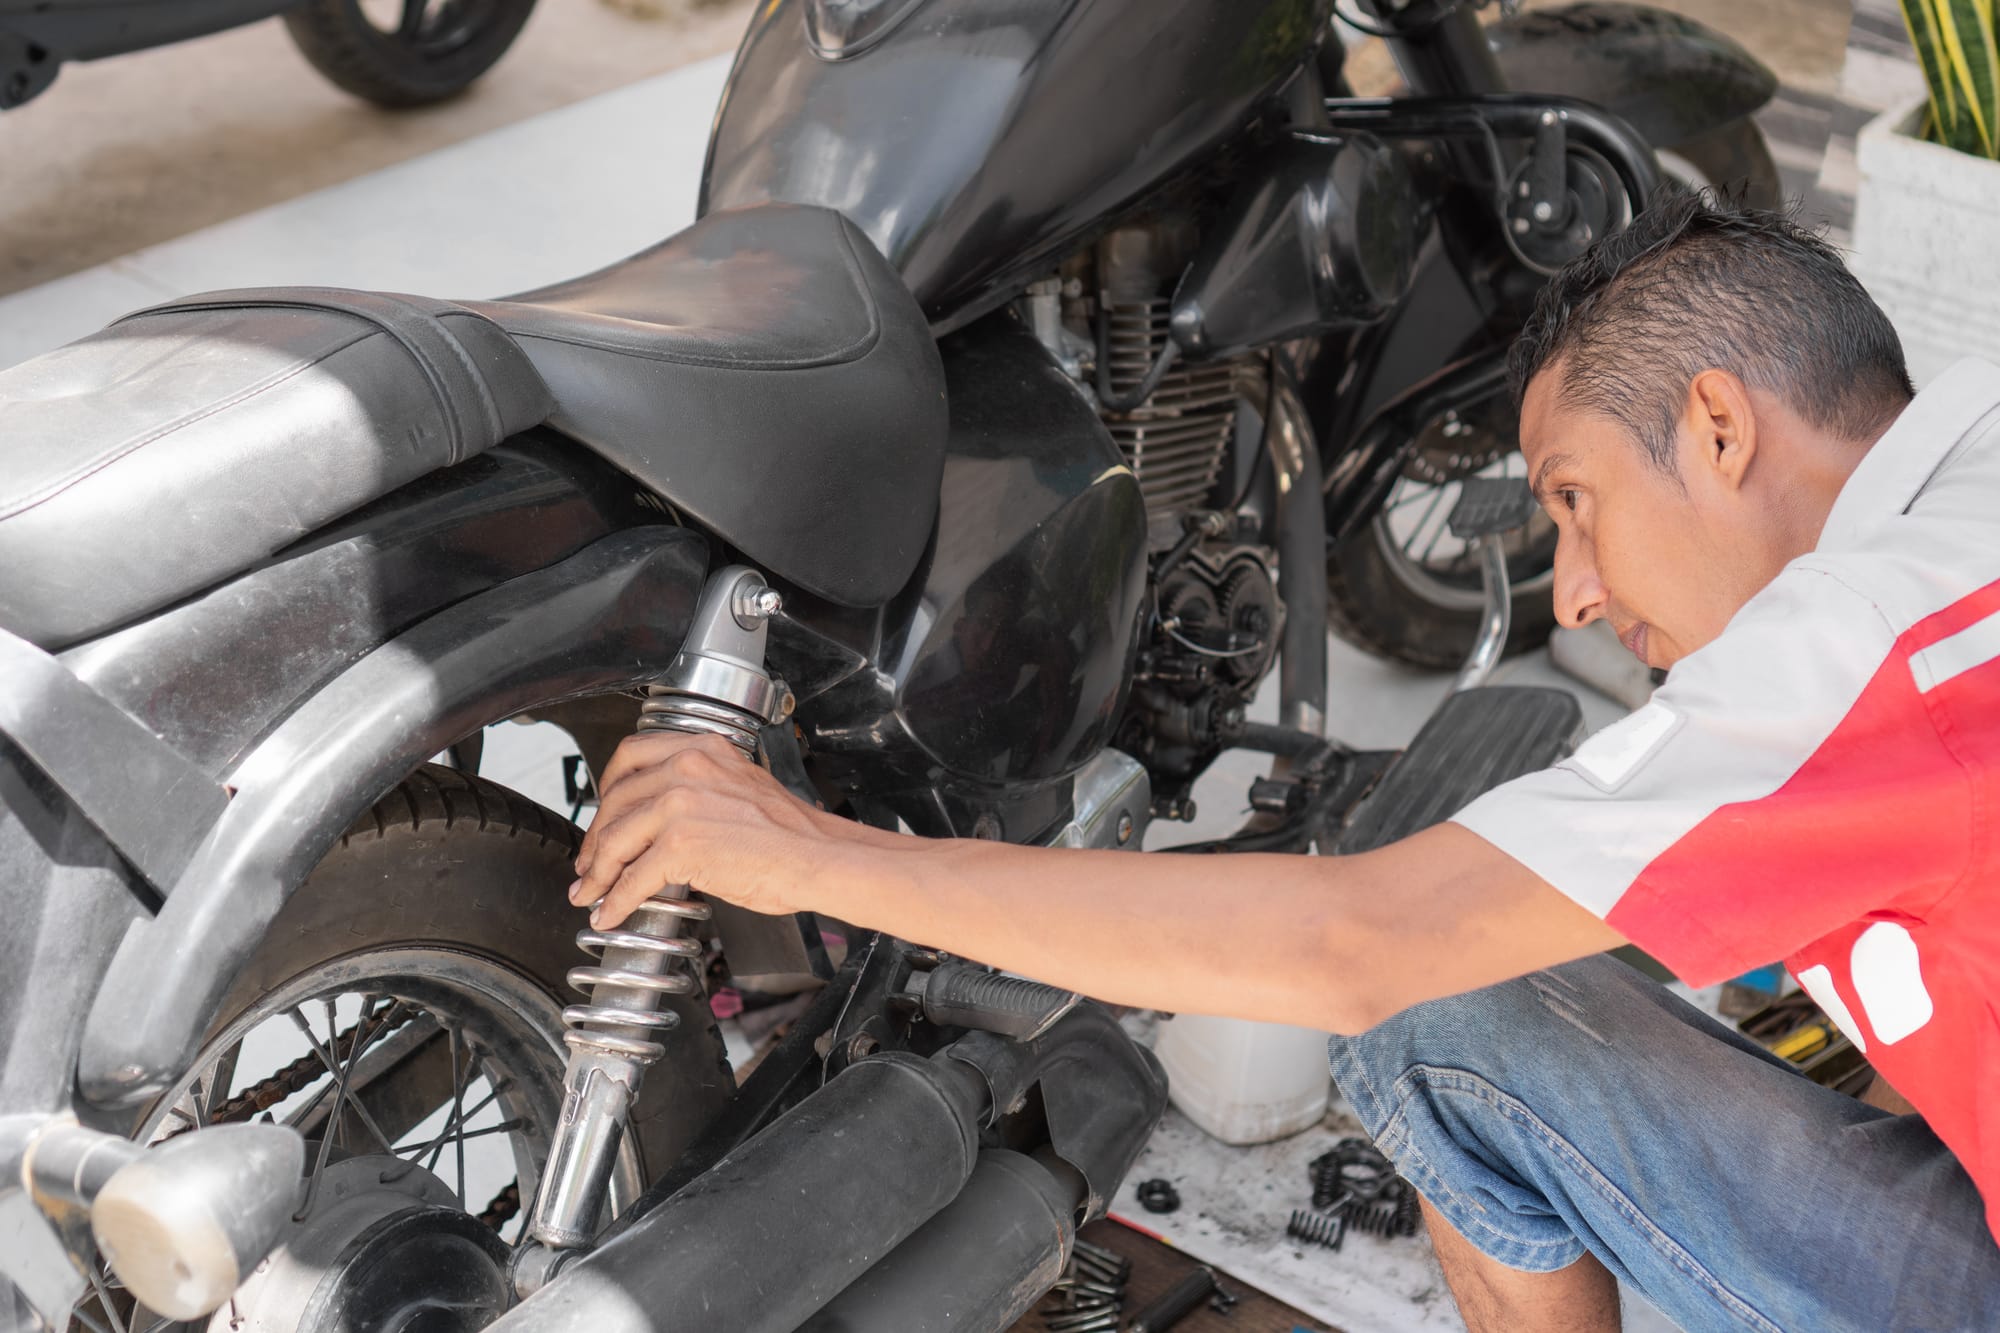
Motorcycle suspension does more than improve comfort. Your forks and shock keep tyres in contact with the road, stabilise braking and acceleration, and protect the frame, wheels, and your body from impacts. The catch is that suspension is also a wear item. Oil shears and contaminates, seals harden, bushings wear, bearings dry out, and settings drift as components age.
This checklist is written in a practical, tip based format so you can work through it like a routine. It focuses on fork and shock longevity, consistent performance, and early detection of problems that become expensive if ignored. It is suitable for everyday road riders, commuters, weekend fast road riders, touring bikes, adventure bikes, and track day bikes. Service intervals vary by model and use, but the inspection habits in this list apply to all.
MENTEX SUSPENSION works with riders across the UK on suspension servicing, repair, and upgrades. Even if you do most checks yourself, a professional service at the right time is what maximises lifespan and keeps performance predictable.
How to use this checklist
- Pick a frequency: Some items are every ride, some monthly, some at tyre changes, and some at annual or mileage intervals.
- Log what you find: Write down clicker positions, sag numbers, dates, mileage, and any symptoms. Trends matter more than one snapshot.
- If you are unsure, stop and ask: Suspension faults can affect safety. When in doubt, book an inspection.
1) Start with a quick safety scan before every ride
- Walk around check: Look for anything obviously wet, loose, cracked, or crooked. Suspension problems often show up as asymmetry.
- Fork legs: Check the shiny stanchions for oil rings, misting, or wet streaks.
- Shock body: Look for oily dust buildup around the shaft area, adjusters, or reservoir. A light film can be normal on some designs, but wetness that returns quickly is not.
- Tyres: Uneven wear can be a suspension symptom, not just a tyre issue. Cupping and scalloping are common clues.
2) Clean forks and shock correctly, not aggressively
- Use mild cleaners: Harsh solvents can dry seals and damage finishes. Use a bike safe cleaner and rinse gently.
- Avoid pressure washers near seals: High pressure water can push grit past dust seals and into oil seals and bushings.
- Microfibre and soft brushes: Wipe stanchions and shock shafts with a clean microfibre. Use a soft brush for stubborn road film, never abrasive pads.
- Dry after washing: Standing water around seals encourages corrosion and grit adhesion.
3) Inspect fork stanchions for damage that kills seals
- Feel for nicks: With clean fingers, lightly feel the stanchion for tiny raised edges. Even small stone strikes can cut seals.
- Look for corrosion pits: Pitting tears seals and accelerates bushing wear. If you see rust specks, address them early.
- Check for discoloration bands: Uneven wear marks can suggest bushing wear or misalignment.
- Do not ignore peeling coatings: Some forks use coated stanchions. Peeling or flaking needs professional attention.
4) Keep fork dust seals clean, because grit is the enemy
- Wipe after wet rides: In the UK, road grit, salt, and spray are frequent. A quick wipe after rain can save seals.
- Seal cleaning tool carefully: If you use a thin seal cleaning tool, be gentle and keep everything clean. You are removing dirt, not digging into the seal.
- Check the dust seal lip: If it looks cracked, hardened, or distorted, it will stop protecting the oil seal properly.
5) Check for oil leaks the right way
- Differentiate mist from a leak: A light oil haze on forks after a ride can occur, but visible drips, rings that return quickly, or oil reaching the caliper area is a leak.
- Compress and inspect: Push down on the front end a few times. Check if fresh oil appears on the stanchion.
- Rear shock shaft area: If you can access the shaft, it should be clean. Oil and grime paste is a warning sign.
- Brake contamination: If fork oil reaches pads or discs, stop riding and fix it. It is a major safety risk.
6) Confirm suspension fasteners are torqued and marked
- Torque matters: Over tightened pinch bolts can distort fork tubes and cause stiction. Under tightened bolts can slip and misalign.
- Use the service manual: Follow torque specs for axle pinch bolts, triple clamp pinch bolts, brake caliper bolts, shock bolts, and linkage bolts.
- Use torque paint or witness marks: A small paint mark helps you see if a fastener has moved over time.
- Recheck after major work: After wheel changes, tyre changes, or brake work, recheck front end fasteners.
7) Align the front end to reduce stiction and bushing wear
- Why alignment matters: Twisted forks create friction, which reduces small bump compliance and accelerates bushing wear.
- Basic alignment routine: After axle installation, follow your manual sequence. Commonly, tighten axle, then pinch bolts in order, then pump the forks before final tightening on one side if specified.
- Check wheel spacer seating: Incorrect spacer placement can side load forks.
- Feel test: With the front wheel off the ground, the steering should move smoothly and the forks should compress without binding.
8) Measure and record sag, then recheck regularly
- Static sag and rider sag: Sag is a quick indicator of spring rate and preload setup. It also reveals when springs are tired or settings drift.
- Record baseline numbers: Write down front and rear rider sag, static sag, preload positions, and your typical gear load.
- Recheck after changes: New tyres, luggage, passenger use, or ride height changes all warrant a sag check.
- Watch for creeping changes: If sag slowly increases with unchanged preload, springs may be settling or a component may be wearing.
9) Set a baseline for clickers and never adjust blindly
- Count clicks from fully in: Record compression and rebound clicks from gently seated. Do not force adjusters.
- Change one thing at a time: Adjust in small steps, typically 1 to 2 clicks. Test the change on a familiar route.
- Return to baseline: If the bike feels worse, go back to your documented baseline rather than guessing.
- Note temperature effects: Cold mornings and hot summer days can change feel. Record ambient temperature if you are tuning.
10) Understand the symptoms of too much or too little rebound
- Too little rebound damping: The bike can feel bouncy, wallowy, and unsettled in a series of bumps. Tyres may chatter.
- Too much rebound damping: The suspension can pack down over repeated bumps, ride harshly, and lose traction.
- Fork dive control: Rebound is not a cure for dive. Dive is more related to spring rate, preload, oil height, compression damping, and braking technique.
- If clickers do nothing: That can indicate internal issues, aerated oil, blocked passages, or an adjuster problem. It is a sign to service.
11) Understand the symptoms of compression damping issues
- Too little compression: Excessive dive under braking, bottoming out, vague steering, and wallow on acceleration.
- Too much compression: Harshness over sharp edges, tyre skipping, reduced grip, and fatigue on longer rides.
- Separate low speed and high speed compression if you have it: Low speed relates to chassis movements like brake dive and squat. High speed relates more to impacts like potholes.
- Chasing comfort can reduce grip: Over soft settings can feel plush but may reduce tyre contact on real roads.
12) Keep preload adjusters healthy and usable
- Do not seize them through neglect: If you never move preload adjusters, they can corrode or stick.
- Exercise adjusters periodically: Turn adjusters through a small range and return to your setting. This helps keep threads and mechanisms free.
- Hydraulic preload: If your shock has hydraulic preload, check for leaks, smooth operation, and consistent resistance.
- Do not use brute force: If an adjuster is stuck, forcing it can break needles, threads, or internal parts.
13) Inspect fork seals and wipers after winter and salted roads
- Salt accelerates corrosion: Corrosion on stanchions and around seal seats reduces seal life.
- Wash more frequently in winter: A gentle rinse and wipe is better than letting salt bake on.
- Check for gritty residue: Grit trapped at the wiper will act like sandpaper on the stanchion.
- Consider fork gaiters for some bikes: They can reduce direct spray exposure, but must be kept clean inside too.
14) Service fork oil on time, because oil is a consumable
- Oil breaks down: Heat cycles, shear, and contamination reduce damping quality and lubrication.
- Typical intervals: Many road bikes benefit from fork oil service every 1 to 2 years, or 10,000 to 20,000 miles, depending on use. Track and off road use can require far more frequent changes.
- Do not rely on mileage alone: Short trips, winter grit, and frequent braking can age oil quickly.
- Benefits: Fresh oil improves damping consistency, reduces wear on bushings, and can extend seal life.
15) Replace fork bushings when wear appears, not only when oil leaks
- Why bushings matter: Worn bushings allow play, which increases friction and accelerates seal wear.
- Signs: Stiction, inconsistent damping feel, fore and aft play, and visible coating wear on bushings during service.
- Preventative replacement: When forks are apart for seals and oil, it is often cost effective to inspect and replace bushings if needed.
- Result: Better compliance, more consistent damping, and longer seal life.
16) Keep an eye on fork oil height and air gap if you tune
- Oil height affects end stroke: A higher oil level reduces air gap and increases progression near the bottom of the stroke.
- Do not guess: Measure precisely with the springs out and forks fully compressed, unless your manual specifies otherwise.
- Do not use oil height to hide a spring problem: Correct spring rate and preload first.
- Consistency is everything: Left and right fork oil height must match.
17) Bleed fork air pressure if your forks have bleed screws
- Pressure builds during riding: Heat and movement can increase internal pressure, affecting feel and seal load.
- Bleed with the front unloaded: Lift the front wheel off the ground if possible and gently open the bleed screws.
- Do not overdo it: A quick release is enough. Do not remove screws fully.
- Check frequency: Track days and long mountain rides benefit most from periodic bleeding.
18) Inspect shock linkage bearings and swingarm pivots regularly
- Linkage health affects shock life: Seized bearings force the shock to work through side loads and stiction, accelerating wear.
- Feel test: With the rear wheel unloaded, move the swingarm through its travel. It should be smooth and free of notches.
- Check for play: Any clunk or lateral movement can indicate worn bearings or bushings.
- Service and grease: Many linkage bearings need periodic cleaning and re-greasing, especially in wet UK conditions.
19) Check head bearings and wheel bearings because they mimic suspension problems
- Head bearings: Notchy steering or a tendency to stand up mid corner can be a head bearing issue, not fork damping.
- Wheel bearings: Rough wheel bearings can cause vibration and instability that feels like suspension harshness.
- Brake drag: Sticking calipers can cause heat and fork dive characteristics that confuse diagnosis.
- Fix foundations first: A well serviced suspension cannot overcome worn bearings and dragging brakes.
20) Keep fork tubes and triple clamps in good condition
- Check pinch areas: Over torquing can leave clamp marks and distort tubes.
- Look for twisting after impacts: A pothole hit can knock alignment out. If the bars and wheel are not in line, investigate immediately.
- Inspect for cracks: Especially on older bikes, track bikes, or bikes that have been crashed.
- Correct installation depth: If you raise forks through yokes for quicker steering, ensure both sides match and clearances are safe at full compression.
21) Protect shock shafts and fork stanchions from stone chips
- Front fender extension: A simple extension can reduce grit blasted onto forks in wet conditions.
- Shock protection: Many shocks sit in the line of spray. A clean, well fitted hugger can reduce contamination.
- Be careful with covers: Shock socks and covers can trap grit if not cleaned. Use them only if you maintain them.
- Inspect after gravel or roadworks: A single gritty ride can start a seal leak if chips occur.
22) Watch your tyre pressures and tyre condition, because suspension follows the tyres
- Pressure affects compliance: Overinflated tyres feel harsh and can be mistaken for stiff suspension.
- Underinflated tyres: Can feel vague, induce wallow, and cause overheating.
- Check cold pressures: Use a reliable gauge and check at consistent temperature.
- Tyre choice: Stiff carcass tyres can require different damping and pressure than softer touring tyres.
23) Understand how luggage and passengers shorten suspension life
- More load means more heat: Heat accelerates oil breakdown and seal wear.
- Set sag for loaded riding: Increase preload as needed to keep geometry and travel in a safe range.
- Consider spring upgrades: If you often tour two up, correct springs reduce bottoming and internal stress.
- Do not ride overloaded: Exceeding weight limits strains shock shafts, bushings, and linkages.
24) Avoid bottoming out, because it is a fork and shock life killer
- What bottoming does: It spikes internal pressures, damages bump rubbers, and can deform shims or piston bands over time.
- Signs: Sharp clunk, sudden harshness, zip tie travel indicator shows full stroke often, and unstable chassis after big hits.
- Fixes: Correct spring rate, correct preload, adjust compression, adjust oil height in forks if appropriate, and improve riding line choices on bad roads.
- Mechanical inspection: Frequent bottoming warrants checking for bent parts and bushing wear.
25) Use a zip tie to monitor fork travel and confirm you are using the stroke correctly
- Simple tool: Put a small zip tie on a fork stanchion. After a ride, see how much travel you used.
- Interpretation: If you use only half the travel on spirited roads, you may be too stiff or over sprung. If you regularly reach full travel, you may be too soft, under damped, or braking very hard.
- Do not chase full travel on every ride: It is normal not to use all travel. The aim is controlled use, not frequent bottoming.
- Record your results: Use the same route and conditions when comparing changes.
26) Check for stiction and inconsistent movement
- Front end test: With front brake held, push down steadily. It should move smoothly, not stick then suddenly release.
- Rear end test: Push down on the seat. The return should be controlled, not pogoing or dead.
- Causes: Misalignment, dry bushings, worn bushings, contaminated oil, bent components, or linkage bearing issues.
- Why it matters: Stiction reduces grip and increases fatigue, and it often indicates wear that will worsen.
27) Listen for noises that indicate looseness or internal wear
- Clicks and clunks: Can be loose caliper bolts, axle issues, worn linkage, or top out spring problems.
- Squeaks: Often linkage bearings or bushings needing grease, sometimes a dry shock eye bushing.
- Slurping sounds: Can indicate aerated fork oil or low oil.
- Do not ignore noise after a pothole hit: Inspect immediately.
28) Keep adjusters, caps, and bleeders clean to prevent contamination
- Clean around adjusters before turning: Dirt can be pulled into the mechanism.
- Fork caps: Dirt around the cap can fall inside during service. Keep them clean.
- Remote reservoirs: Ensure hoses are not rubbing through and fittings are clean and dry.
- Protective caps: Replace missing caps on Schrader valves or adjusters.
29) Check shock and fork mounting points for play
- Shock eyelets: Inspect for side play and worn bushings. Some shocks use spherical bearings that wear and need replacement.
- Top mounts: Check access points for cracks or deformation, especially on older frames.
- Fork axle and caliper mounts: Worn threads, damaged mounts, or incorrect spacers can misalign the fork legs.
- Any play affects damping feel: It introduces slop that feels like poor suspension even when the internals are fine.
30) Service rear shocks before they fail, because many are not rebuildable by default
- Why shocks are neglected: Unlike fork seals, shock wear is less visible until performance drops significantly.
- Oil and gas degrade: Shock oil shears, seals wear, and nitrogen pressure can drop. This changes damping and increases heat.
- Intervals depend on use: High mileage commuting, aggressive riding, and heavy loads shorten shock service life.
- Rebuild versus replace: Many OEM shocks are technically sealed, but specialist services can often rebuild or upgrade depending on design.
31) Watch for heat fade on long rides
- Symptom: The bike feels controlled early on, then gradually becomes bouncy, vague, or harsh.
- Cause: Damping changes as oil temperature rises. Worn oil and low gas pressure worsen fade.
- Prevention: Correct springing reduces damping workload, and servicing keeps oil and seals healthy.
- Upgrades: If you frequently ride hard or carry loads, a higher quality shock or revalve can improve heat management.
32) Identify early signs your suspension needs servicing now
- Fork seal weeping that returns after cleaning: Repeated oil rings indicate the seal is compromised or the stanchion is damaged.
- Harsh ride over small bumps: Can indicate stiction, dirty oil, or worn bushings.
- Excessive dive or squat with no setting changes: Can indicate spring sag, worn oil, or internal leakage.
- Clickers have little effect: Can indicate internal wear or blocked circuits.
- Bike feels unstable with correct tyres: If tyre pressures and tyres are good, suspension may be out of spec.
33) Use correct tools and methods if you do DIY maintenance
- Use a torque wrench: Guessing torque on triple clamps and axles is risky.
- Use proper stands: A stable front and rear stand prevents accidents during checks.
- Keep everything clean: Suspension components are sensitive to contamination.
- Follow the manual: Oil volume, oil height, torque sequences, and bleeding procedures vary by model.
34) Do not mix oils, greases, and fluids without a plan
- Fork oil viscosity matters: Different brands can label viscosity differently. Stick to a known product and record it.
- Do not top up unknown oil: Mixing can change damping and cause foaming or seal compatibility issues.
- Grease choice for linkages: Use a quality waterproof grease suitable for bearings in wet environments.
- Brake cleaner caution: Keep brake cleaner away from seals and painted surfaces.
35) Maintain correct riding technique to reduce suspension stress
- Smooth inputs: Abrupt braking and throttle chops create sharp weight transfers that increase bottoming risk.
- Look ahead for potholes: Avoid square edge hits when possible. UK road damage is a common suspension killer.
- Use your legs: On rough roads and especially on adventure bikes, lighten the seat and let the bike move beneath you.
- Warm up pace: Cold oil is thicker. Give suspension a few miles to reach operating temperature before pushing hard.
36) Prepare suspension for storage and long periods off the road
- Clean before storage: Remove road salt and grime from stanchions, shock shafts, and linkages.
- Relieve load if possible: Storing with wheels off the ground reduces static load on springs and seals, though it is not always practical.
- Avoid damp environments: Corrosion on stanchions and shafts starts quickly in damp sheds.
- Cycle suspension occasionally: If stored for months, gently compress forks and shock a few times to keep seals lubricated.
37) Create a realistic service schedule based on your riding type
- Commuting in all weather: Frequent cleaning, quarterly inspections, and earlier oil changes due to grit and salt exposure.
- Weekend fast road riding: Regular sag checks, clicker baselines, and annual inspection for leaks and bushing wear.
- Track days: More frequent oil changes, frequent bleeding if applicable, and close monitoring of seals and bushings.
- Adventure and off road: Increased seal inspection frequency, more frequent linkage servicing, and careful cleaning after mud rides.
- Touring with luggage: More attention to preload, shock heat fade, and linkage lubrication.
38) Keep a suspension logbook that makes diagnosis easy
- What to record: Mileage, dates, tyre model and pressure, sag numbers, clicker settings, load conditions, and any symptoms.
- Record changes and results: Note what you adjusted and whether it improved braking stability, cornering feel, or bump absorption.
- Add service history: Oil type, oil weight, seal replacements, bushing replacements, and any upgrades.
- Benefits: A logbook speeds up professional diagnosis and prevents you from repeating ineffective changes.
39) Check geometry and ride height changes after any suspension work
- Small changes matter: Fork height in the yokes, shock length, and preload affect rake, trail, and swingarm angle.
- Symptoms of geometry issues: Nervous steering, difficulty holding a line, running wide, or instability on acceleration.
- Measure before and after: If you adjust fork height or change shock length, measure and record the original and new settings.
- Combine with sag checks: Ride height adjustments without sag verification can produce misleading results.
40) Inspect and maintain related components that protect suspension
- Fork guards and fenders: Ensure they are secure and not rubbing stanchions or trapping grit.
- Chain tension: Incorrect chain tension affects suspension movement on some bikes, especially with tight spots in the chain.
- Sprocket and cush drive wear: Jerky driveline can feel like poor shock rebound control.
- Engine mounts and chassis bolts: Loose mounts can create vibrations and handling issues mistaken for suspension faults.
41) Know when an upgrade is better than repeated servicing
- Out of range adjustability: If you cannot achieve correct sag without extreme preload, you need springs.
- Consistent fade: If your riding regularly overheats the shock, a better shock or revalve may be needed.
- Mismatch to rider weight: Many stock setups are generic. Correct spring rates reduce wear and improve control.
- Budget smart: Upgrading springs and servicing properly often delivers more benefit than chasing clicker settings.
42) Perform a structured test ride after any adjustment or service
- Use the same loop: Choose a route with braking zones, mid corner bumps, and a few faster sections.
- Evaluate in phases: First assess straight line braking. Then corner entry. Then mid corner compliance. Then exit traction.
- Do not change multiple things: One change per ride helps you learn cause and effect.
- Stop if unsafe: If the bike becomes unstable, return to baseline and inspect for mechanical issues.
43) Know the common myths that shorten fork and shock life
- Myth, suspension lasts forever if it does not leak: Oil and seals degrade long before leaks appear.
- Myth, turning clickers fixes worn oil: Clickers cannot restore lubrication or replace degraded oil.
- Myth, stiffer is safer: Overly stiff settings reduce traction on real UK roads and can increase crash risk.
- Myth, leaking forks just need thicker oil: Thicker oil does not fix damaged seals and can worsen damping behavior.
44) Build a simple at home maintenance kit
- Clean microfibre cloths: Dedicated to suspension and brake areas.
- Bike safe cleaner: Mild and suitable for seals.
- Small torch: For spotting weeps and stanchion damage.
- Tyre pressure gauge: Accurate and consistent.
- Tape measure and helper: For sag measurements.
- Torque wrench: Essential for axle and clamp bolts.
- Notebook or phone notes: For clicker and sag logs.
45) Use professional servicing strategically for maximum lifespan
- What a full service addresses: Oil change, seal inspection, bushing inspection, internal cleaning, nitrogen recharge for shocks where applicable, and inspection of wear parts.
- Why it extends life: Fresh fluids and correct tolerances reduce friction and heat, which are major drivers of wear.
- Best time to service: Before peak riding season, before a touring holiday, or as soon as symptoms appear.
- Bring your logbook: A good suspension technician can work faster and more accurately with your notes.
46) A practical frequency plan you can copy
- Before every ride: Quick safety scan, obvious leaks, tyre pressures, and basic feel.
- Weekly or after wet rides: Clean stanchions and shafts, wipe dust seals, inspect for fresh oil rings.
- Monthly: Check sag, check fasteners visually, check adjusters move smoothly, inspect linkage area for grime and play.
- At every tyre change: Front end alignment routine, inspect wheel bearings, inspect brake pad contamination, check head bearing feel.
- Every 12 months or by usage: Fork oil service for many road bikes, linkage clean and grease for wet use, shock assessment.
- Every 2 years or earlier by symptoms: More thorough fork inspection including bushings, shock service where rebuildable, replace worn bearings.
47) When to stop riding and get help immediately
- Oil on brake discs, calipers, or pads: Do not ride.
- Sudden major change in handling: Could indicate a loose axle, loose shock bolt, or internal failure.
- Clunking after an impact: Could be a bent component or loose fastener.
- Visible bend or misalignment: Do not attempt to ride it straight.
- Shock leaking significantly: If the rear becomes bouncy and uncontrolled, it is unsafe at speed.
48) Checklist summary you can screenshot
- Clean: Keep stanchions and shafts clean, avoid pressure washing seals.
- Inspect: Look for oil, nicks, pits, corrosion, and dirt at seals.
- Align: Install front wheel and axle correctly to reduce stiction.
- Torque: Use correct torque on clamps, axles, calipers, shock and linkage bolts.
- Measure: Track sag and fork travel usage, record clicker baselines.
- Lubricate: Service linkages and pivots, keep bearings healthy.
- Service fluids: Fork oil and shock internals need periodic servicing even without leaks.
- Act early: Address symptoms quickly to prevent expensive damage.
Final note for UK riders
UK conditions are tough on suspension. Rain, road salt, grit, and potholes accelerate seal wear and contaminate oil. The best approach is consistent light maintenance combined with timely professional servicing. If your forks or shock feel harsh, vague, or inconsistent, or if you notice repeated weeping, it is usually cheaper to service early than to replace damaged parts later.
If you want a suspension health check, servicing, repair, or an upgrade plan tailored to your weight, bike, and riding, MENTEX SUSPENSION can help you extend fork and shock life and keep your motorcycle handling predictably.